

Highly Available HashiCorp Vault on Azure - #2 deploying with Terraform
Published:
Welcome back to my series on running HashiCorp Vault on Azure. In this installment we are going to deploy a functional Vault cluster on Azure using HashiCorp Terraform.
We will use the design established in the first post of this series.
This post assumes a basic understanding of HashiCorp Terraform. If you’re new to Terraform, I recommend to catch up using the Getting started guide.
Modules
I’ve created some Terraform modules beforehand that we are going to use for the deployment. These modules can be found on my GitHub.
I’ll quickly go over the Terraform modules we are going to use and their function.
terraform-azure-vault-tls
The terraform-azure-vault-tls module is used for creating the TLS certificates that are needed to run Vault. This includes a root CA and a server certificate. It creates these certs and converts them from a pem to pfx format, for this conversion it uses a self-generated password. Then it creates an SSH key that is going to be used to access the Vault machines.
It also creates an Azure Key Vault where it will store the created certificates and ssh key.
terraform-azure-vault-kms
The terraform-azure-vault-kms module’s only responsibility is to create an Azure Key Vault Key. This key is going to be used by Vault for auto unsealing the cluster nodes.
It creates this key on the Key Vault created by the terraform-azure-vault-tls module.
terraform-azure-vault-iam
The terraform-azure-vault-iam module will create two user assigned managed identities that will be assigned to the VM Scale-set and our Application Gateway. It creates Key Vault access policies for the identities with their respective permissions.
It also creates a custom role definition that is going to be used by Vault to read our VM Scale-set. This is needed for the auto-join function of Vault’s clustering mechanism.
terraform-azure-vault-vnet
The terraform-azure-vault-vnet module is responsible for creating the network infrastructure. It creates a virtual network and all the needed subnets. Then it deploys the needed security groups, NAT gateway, and Bastion Host.
terraform-azure-vault-load-balancer
The terraform-azure-vault-load-balancer module creates the Azure Application Gateway needed for load-balancing our Vault cluster. This includes all the needed listeners, backend-configs, rules, and ssl config.
terraform-azure-vault-user-data
The terraform-azure-vault-user-data module will create the user-data script that will be used in the deploying of the Virtual Machines. It contains instructions to install the Azure CLI, retrieve secrets from Key Vault, install Vault, setup Vault config, and start the Vault service.
This script uses Azure’s Instance Metadata Service to retrieve information of the VM it is running on. This way the script is very modular and easily scalable.
terraform-azure-vault-vmss
The terraform-azure-vault-vmss module is used for the creation of the VM Scale-set that Vault will run on. It also installs the VM Scale-set extension for monitoring the Vault servers for healthiness.
Deploying!
Finally, it’s deployment time!
I’ll quickly glance over the needed resources and module invocations. But these modules are highly customizable by changing the input variables. More on these variables can be found in each module’s respective GitHub repo. This way the deployment can be adapted to your personal environment.
First things first, let’s create a resource group within our Azure tenant:
resource "azurerm_resource_group" "rg" {
  name     = "dev-vault"
  location = "westeurope"
}
Great, we can now use this resource group to deploy our resources in.
Next up we need to retrieve some extra needed info from Azure. This includes the tenant-id and subscription-id. We will need this later when calling our user-data module.
To do this, insert the following:
data "azurerm_client_config" "current" {}
This will retrieve the environnement info from the identity currently running the deployment. This includes the aforementioned subscription-id and tenant-id.
Now it is time to call our modules. We’ll start by calling the TLS module:
module "tls" {
  source         = "git@github.com:rickmoonex/terraform-azure-vault-tls.git"
  resource_group = azurerm_resource_group.rg
  shared_san     = "vault.yourdomain.com"
}
For the shared_san variable you can fill in the domain name that is going to point to the load balancer we are going to create. This makes sure that all requests coming from that endpoint are verified by Vault.
Next up are the KMS and IAM modules:
module "kms" {
  source       = "git@github.com:rickmoonex/terraform-azure-vault-kms.git"
  key_vault_id = module.tls.key_vault_id
}

module "iam" {
  source         = "git@github.com:rickmoonex/terraform-azure-vault-iam.git"
  key_vault_id   = module.tls.key_vault_id
  resource_group = azurerm_resource_group.rg
  tenant_id      = data.azurerm_client_config.current.tenant_id
}
Now we can add our VNET and Load Balancer modules:
module "vnet" {
  source         = "git@github.com:rickmoonex/terraform-azure-vault-vnet.git"
  resource_group = azurerm_resource_group.rg
}

module "lb" {
  source                       = "git@github.com:rickmoonex/terraform-azure-vault-load-balancer.git"
  backend_ca_cert              = module.tls.root_ca_pem
  backend_server_name          = "vault.yourdomain.com"
  identity_ids                 = [module.iam.lb_identity_id]
  key_vault_ssl_cert_secret_id = module.tls.key_vault_ssl_cert_secret_id
  resource_group               = azurerm_resource_group.rg
  subnet_id                    = module.vnet.lb_subnet_id
}
For the load-balancer module you need to fill in the backend_server_name variable with the same values as the shared_san variable in the TLS module.
Now we can finally add the final modules for the user-data and the Scale-set:
module "user-data" {
  source                = "git@github.com:rickmoonex/terraform-azure-vault-user-data.git"
  key_vault_name        = element(split("/", module.tls.key_vault_id), length(split("/", module.tls.key_vault_id)) - 1)
  key_vault_key_name    = module.kms.key_vault_key_name
  key_vault_secret_id   = module.tls.key_vault_vm_tls_secret_id
  leader_tls_servername = "vault.yourdomain.com"
  resource_group        = azurerm_resource_group.rg
  tenant_id             = data.azurerm_client_config.current.tenant_id
  subscription_id       = data.azurerm_client_config.current.subscription_id
  vm_scale_set_name     = "dev-vault"
  pfx_password          = module.tls.pfx_password
}

module "vmss" {
  source                         = "git@github.com:rickmoonex/terraform-azure-vault-vmss.git"
  application_security_group_ids = module.vnet.vault_application_security_group_ids
  backend_address_pool_ids       = [module.lb.backend_address_pool_id]
  health_check_path              = "/v1/sys/health?activecode=200&standbycode=200&sealedcode=200&uninitcode=200"
  identity_ids                   = [module.iam.vm_identity_id]
  instance_count                 = 3
  resource_group                 = azurerm_resource_group.rg
  resource_name_prefix           = "dev"
  ssh_public_key                 = module.tls.ssh_public_key
  subnet_id                      = module.vnet.vault_subnet_id
  user_data                      = module.user-data.vault_userdata_base64_encoded
  scale_set_name                 = "dev-vault"
  zones                          = [1, 2, 3]
}
For the user-data module you need to fill in the leader_tls_servername variable with the same values as the shared_san variable in the TLS module.
When this is done you can apply your Terraform config using the terraform apply command or by using the CI/CD tool of your choosing.
Initializing
After we deployed our cluster we’ll have to wait a couple of minutes for the user-data script to finish and for Vault to start.
Now we need to SSH into one of the Vault VMs using the Azure Bastion host as shown below:
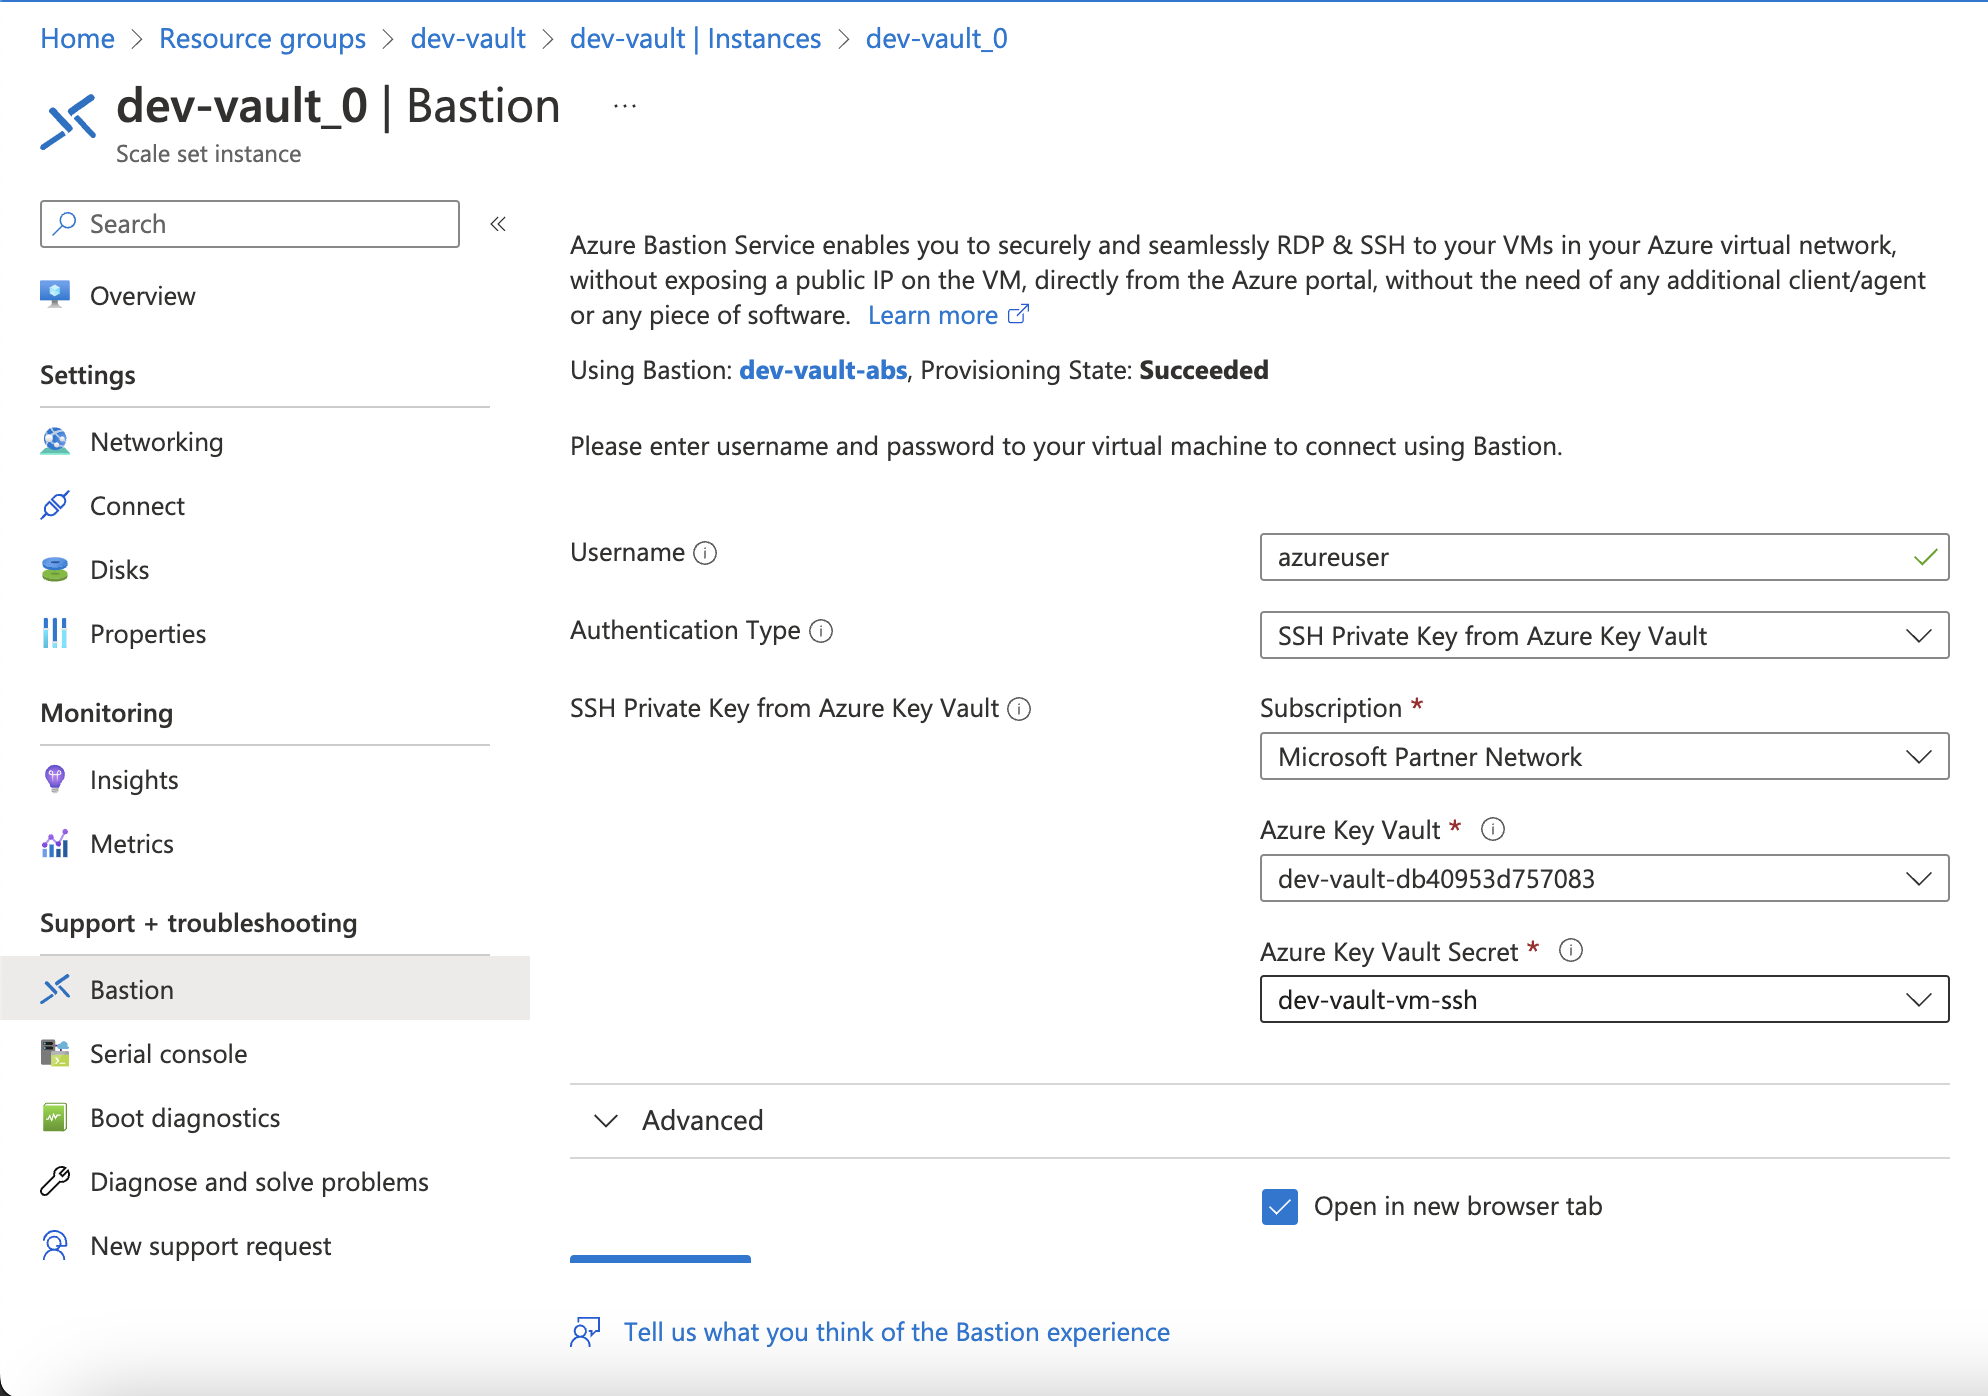
When you’re in the Vault you need to initialize it with the following commands:
export VAULT_SKIP_VERIFY=true
vault operator init
It should give you an output like this:
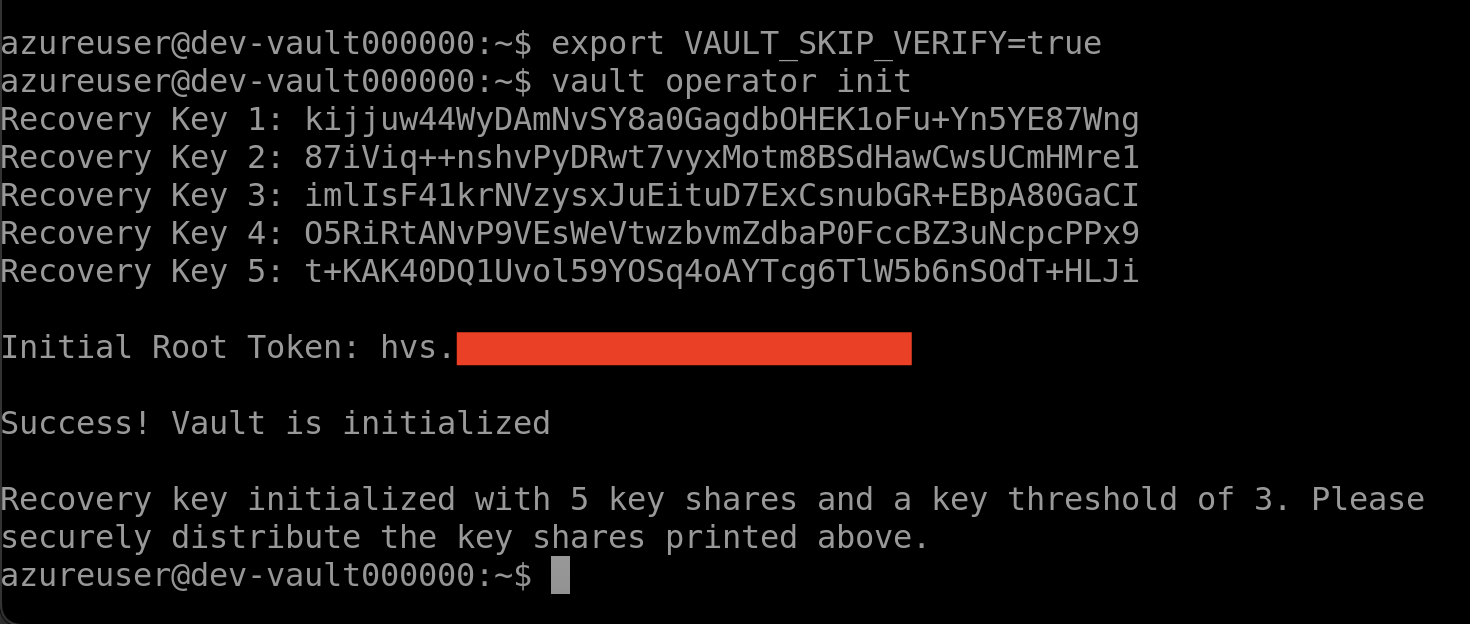
You are given the recovery codes for the Vault cluster. These code are required when Vault is not able to auto-unseal itself with Azure Key Vault.
This command will also give you the Initial Root Token. This token is used to login to the cluster with root permissions.
Testing
Now, let’s test if Vault is working.
First make sure that you created a DNS entry with the FQDN you have provided in the Terraform config. This entry should point to the Public IP associated with the Application Gateway.
Now you should be able to visit the Vault cluster by visiting https://<your fqdn>:8200/. You will see a login page like below:

Here you can login with your Initial Root Token.
And hurray! You’re Vault cluster is up and running!
What’s next?
In the next installment in this series I’m going to show you how to connect Vault to Azure AD for authentication. So stay tuned!
If you find this useful please share with the buttons below. Thanks!